Before you start
- Logged in to Patient Watch
- Organisation set up
Create a template
Set up questionnaires, intervention details, and clinic contact so you can reuse this setup.
Step 1
Open Templates
Templates let you reuse questionnaire schedules, intervention setup, and clinic contact for future invites.
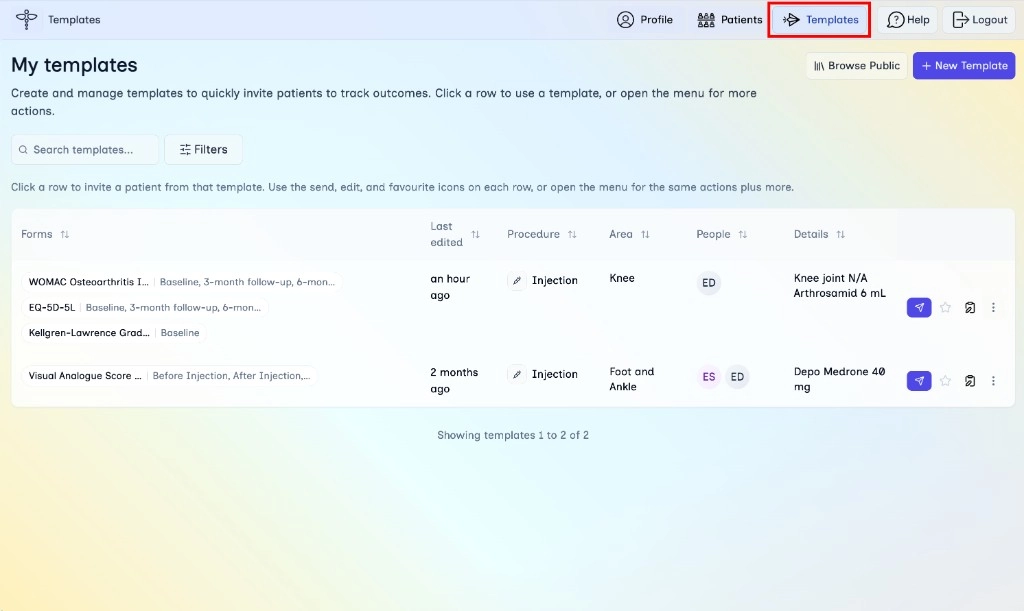
- In the top navigation, click Templates.
- You land on My templates, where you can create, search, and manage your setups.
Step 2
Start a new template
Begin a new setup you can reuse whenever you invite patients.
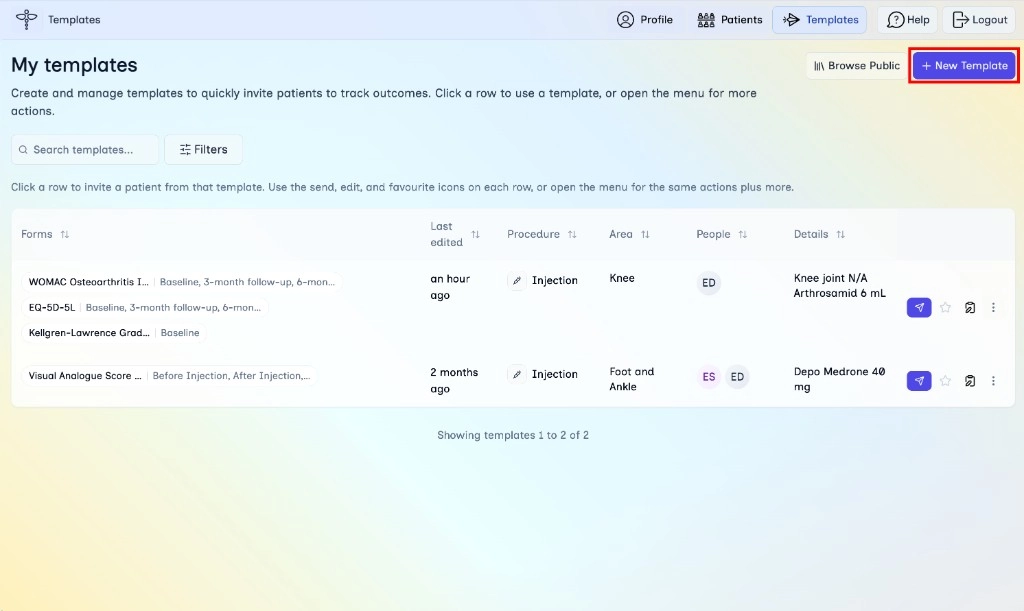
- Click + New Template in the top right.
- The template wizard opens on the first step: Questionnaire Schedule.
Step 3
Choose questionnaires
Pick what patients will answer and when. The stepper shows Questionnaire Schedule; each row is labelled Data Collection.
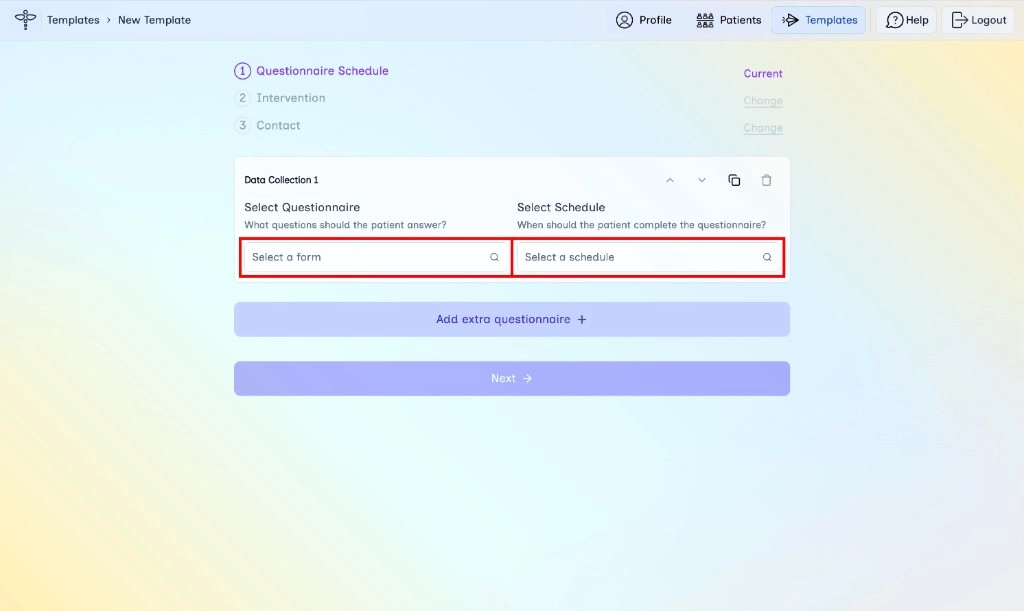
- Under Data Collection 1, open Select Questionnaire and choose a form (for example, Visual Analogue Score and Comments).
- Open Select Schedule and choose when patients should complete it (for example, Baseline, Week 2, Month 1, Month 3, Month 6).
- To add another form, use Add extra questionnaire.
Step 4
Confirm schedule
Check your selections before moving on.
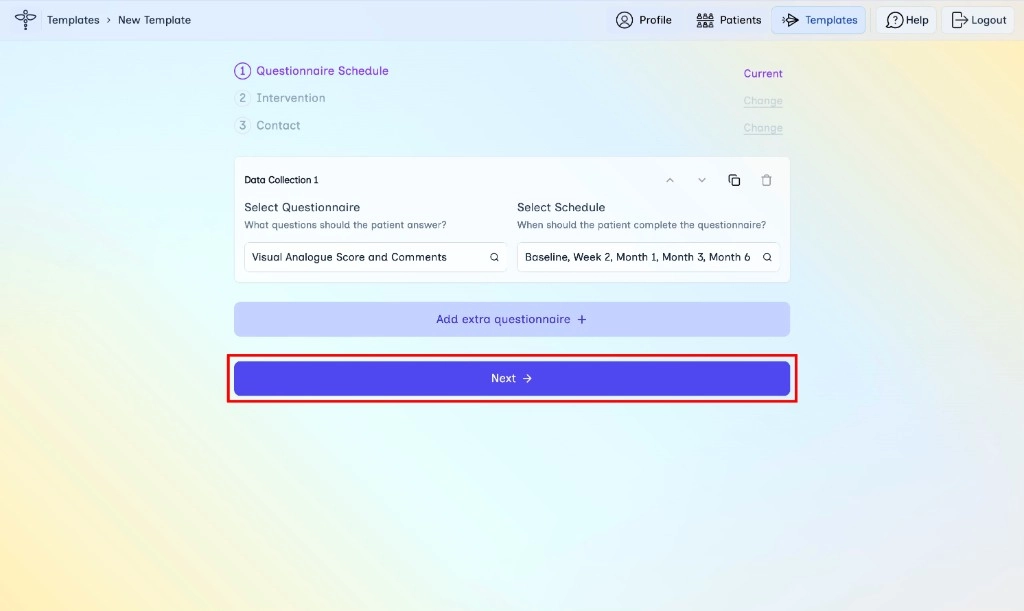
- Review the questionnaire and schedule for each data collection row.
- Click Next to continue to Intervention.
Step 5
Choose intervention
Tell Patient Watch what kind of care this template is for.
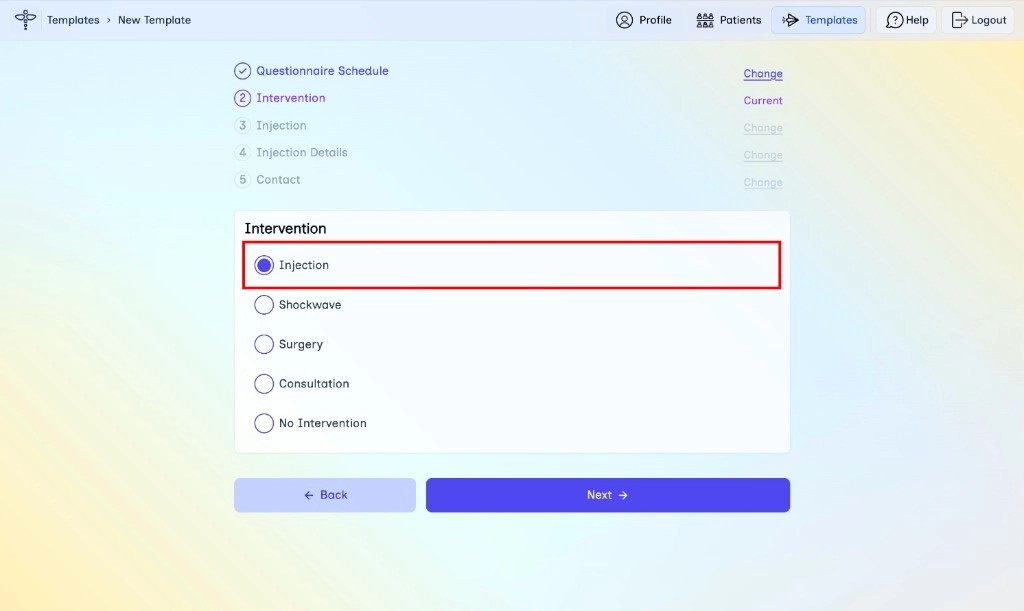
- On the Intervention step, select the type that matches your pathway (for example, Injection).
- Click Next.
Step 6
Injection clinicians
Record who requested and performed the injection, and how it was done.
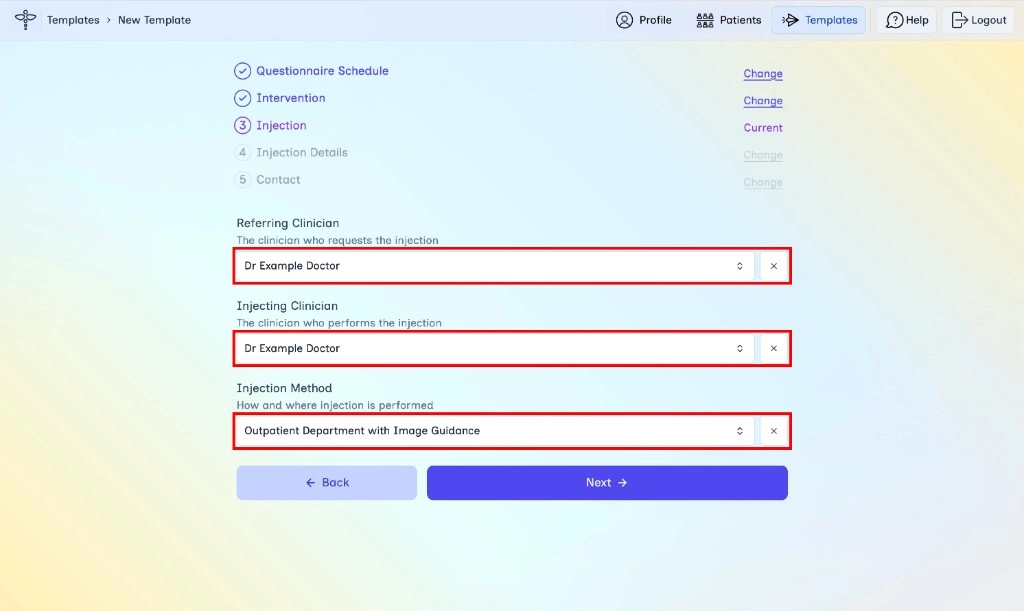
- Choose the Referring Clinician (the clinician who requests the injection).
- Choose the Injecting Clinician (the clinician who performs the injection).
- Choose the Injection Method (for example, Outpatient Department with Image Guidance).
- Click Next.
Step 7
Injection details
Add details about each injection site and substance. You do not need to fill in every field on this step.
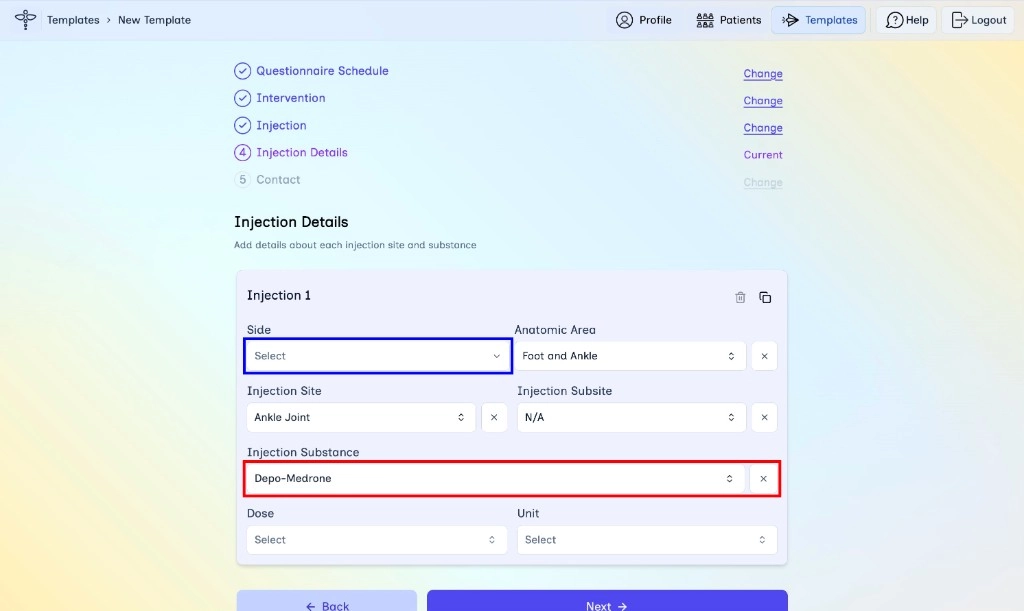
- Set Anatomic area, Injection Site, and Injection Subsite as needed.
- Choose the Injection Substance, plus Dose and Unit if applicable.
- You can leave Side on Select if you do not know it yet.
- Click Next.
Step 8
Clinic contact
Choose who patients can contact if they need further help from the clinic.
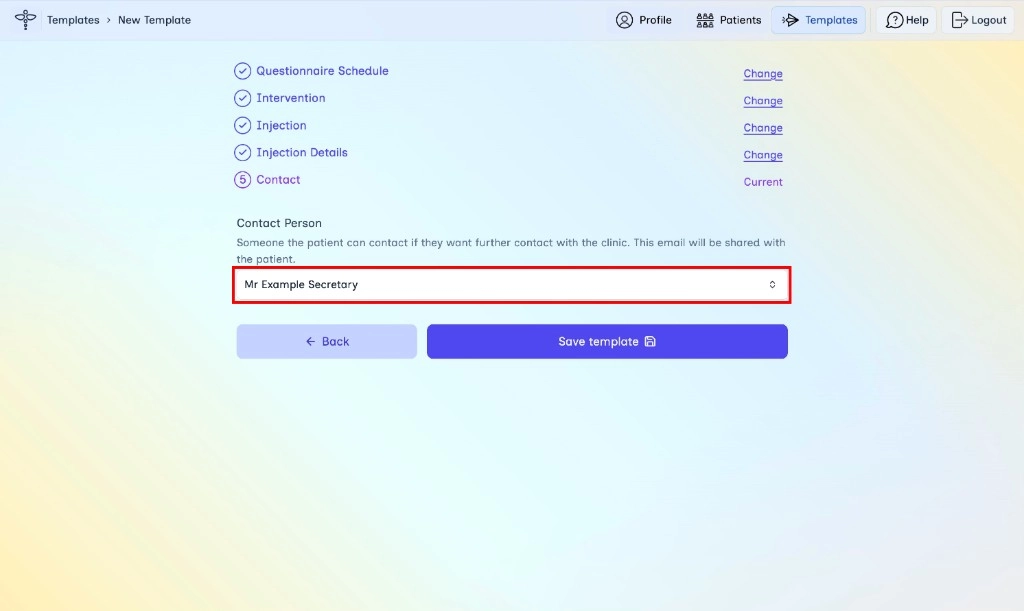
- On the Contact step, select a Contact Person. Their email is shared with the patient.
- Click Save template.
What's next
Continue with the next lessons in the secretary learning path.