Before you start
- Logged in to Patient Watch
- At least one saved template
- For an email invite, the patient email address
Start a new diary
Pick a template, then invite the patient in one of two ways: send an email ahead of the appointment, or share a QR code when they are with you.
Step 1
Open New diary
Start from the Patients list when you need to invite someone for the first time.
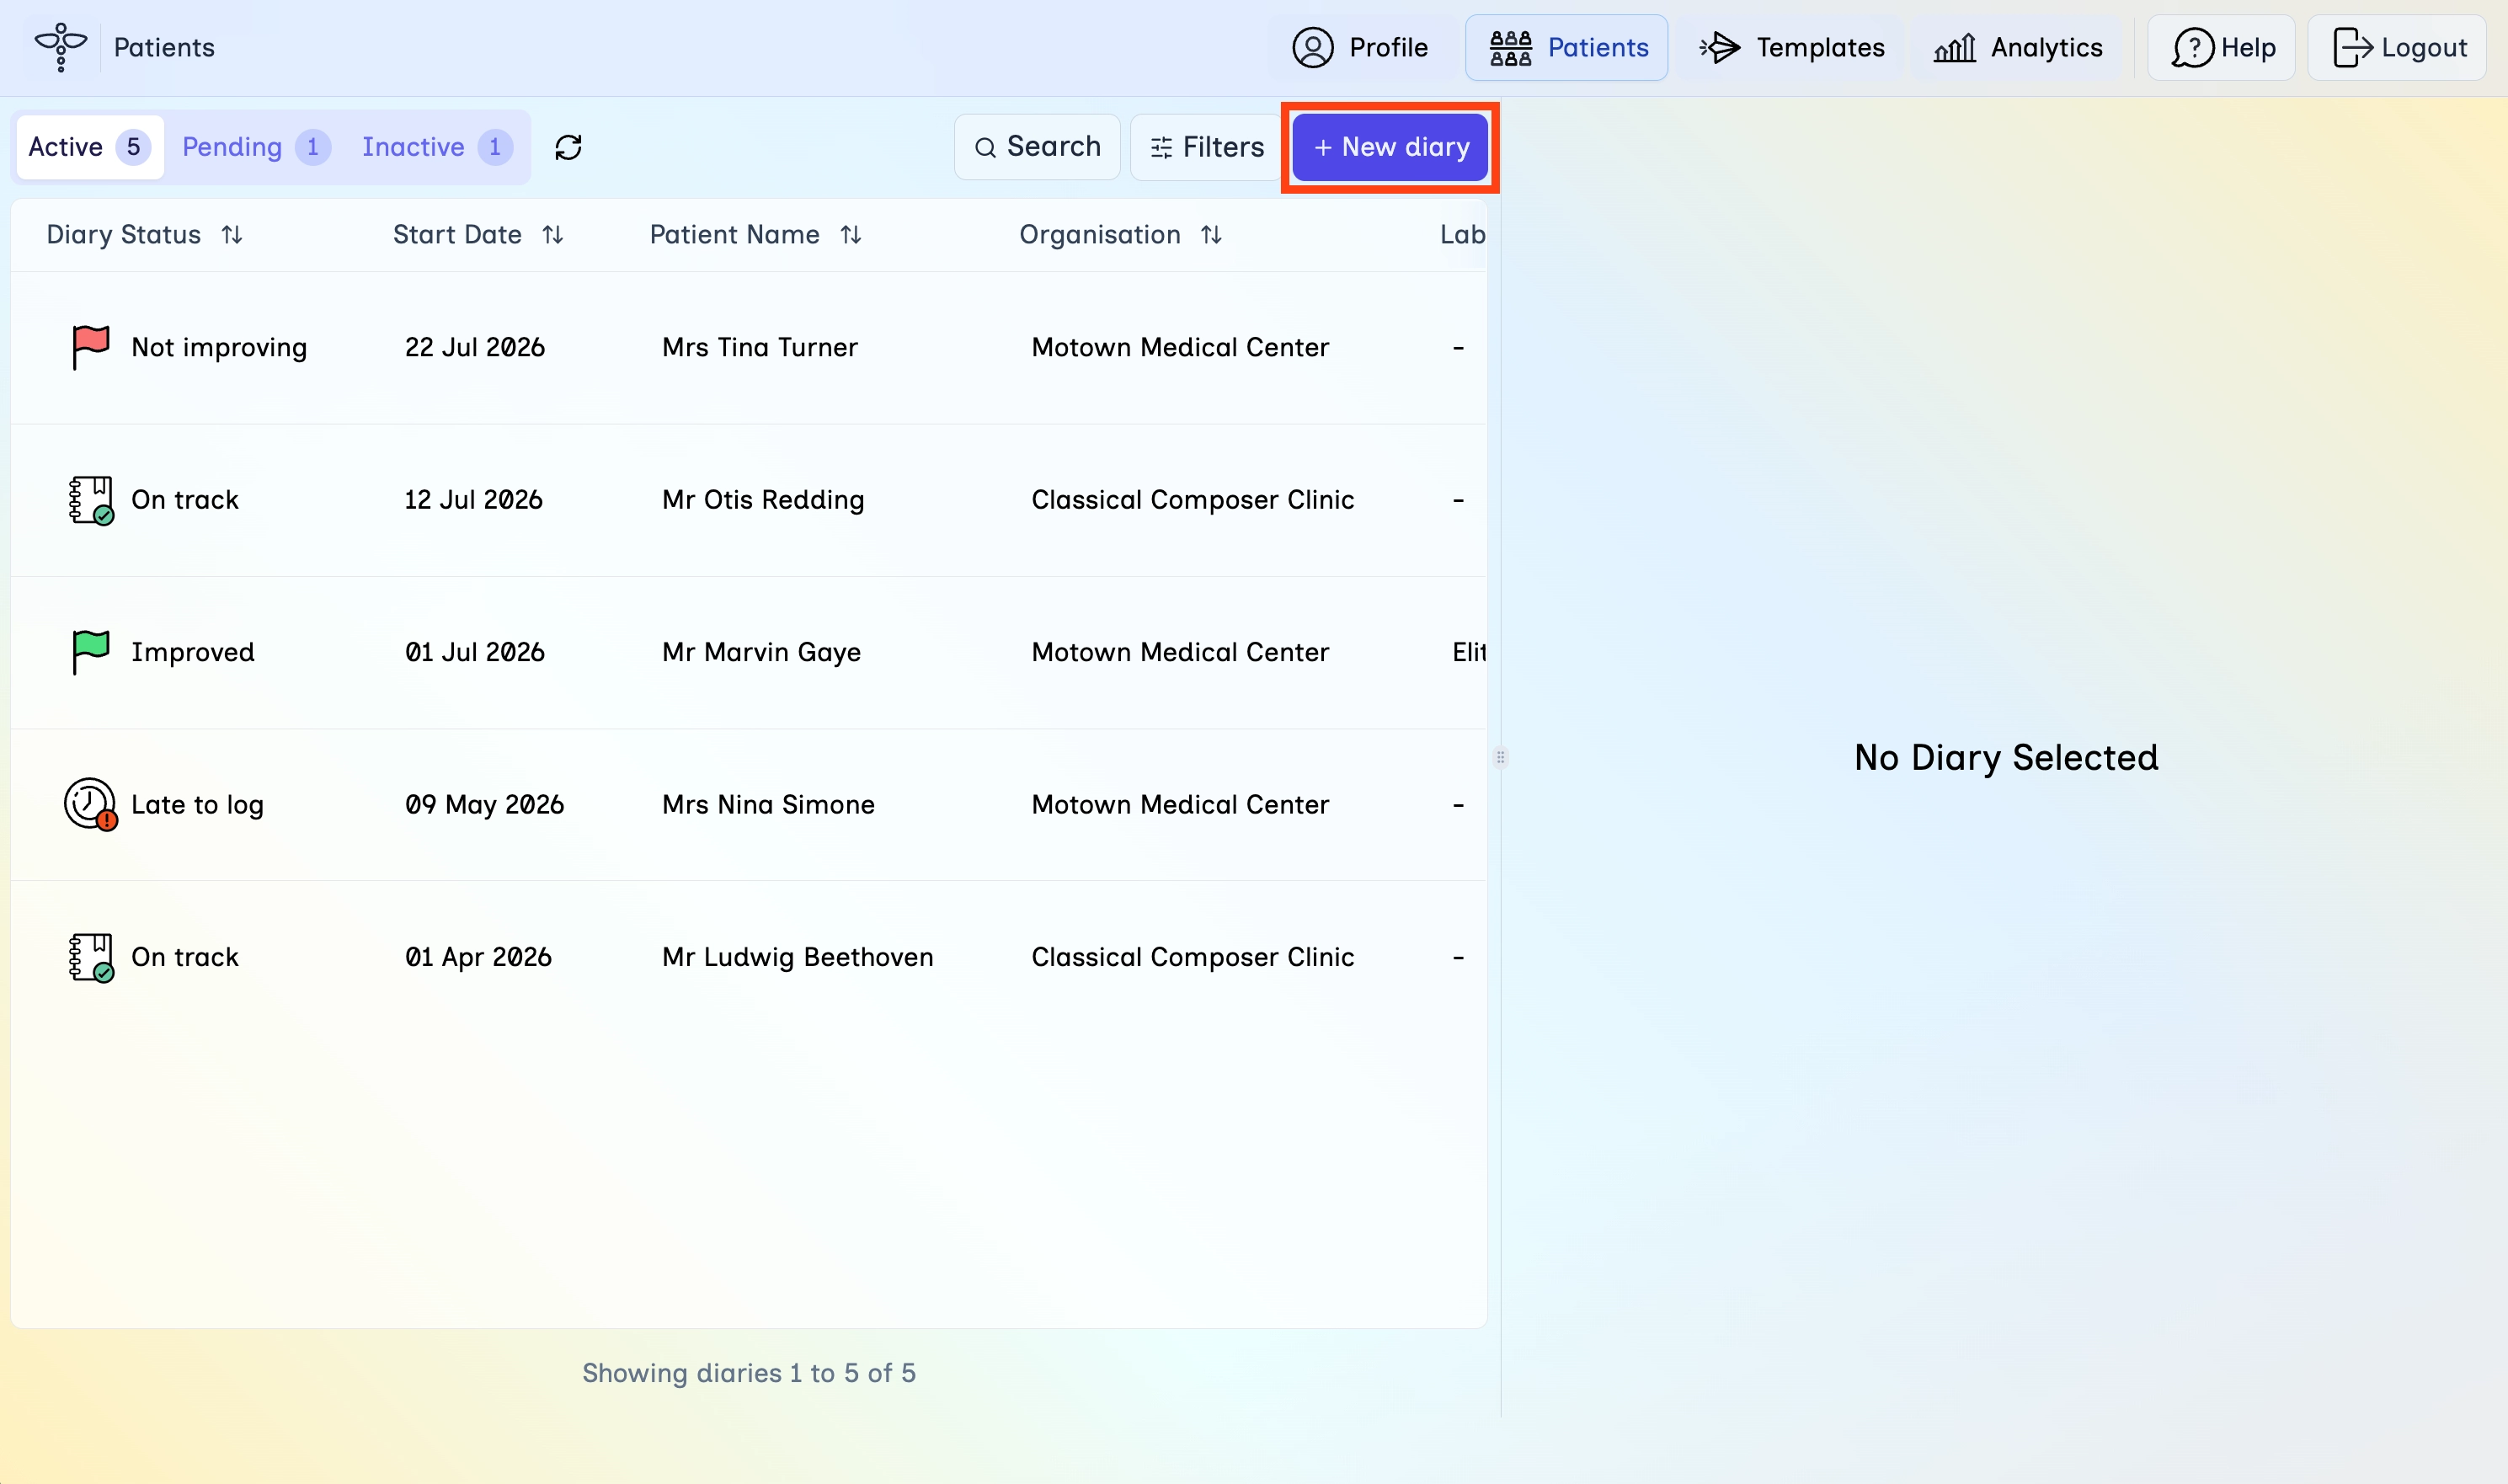
- In the top navigation, click Patients.
- Click + New diary in the top right of the diary list.
Step 2
Choose a template
Select the reusable setup that matches this pathway.
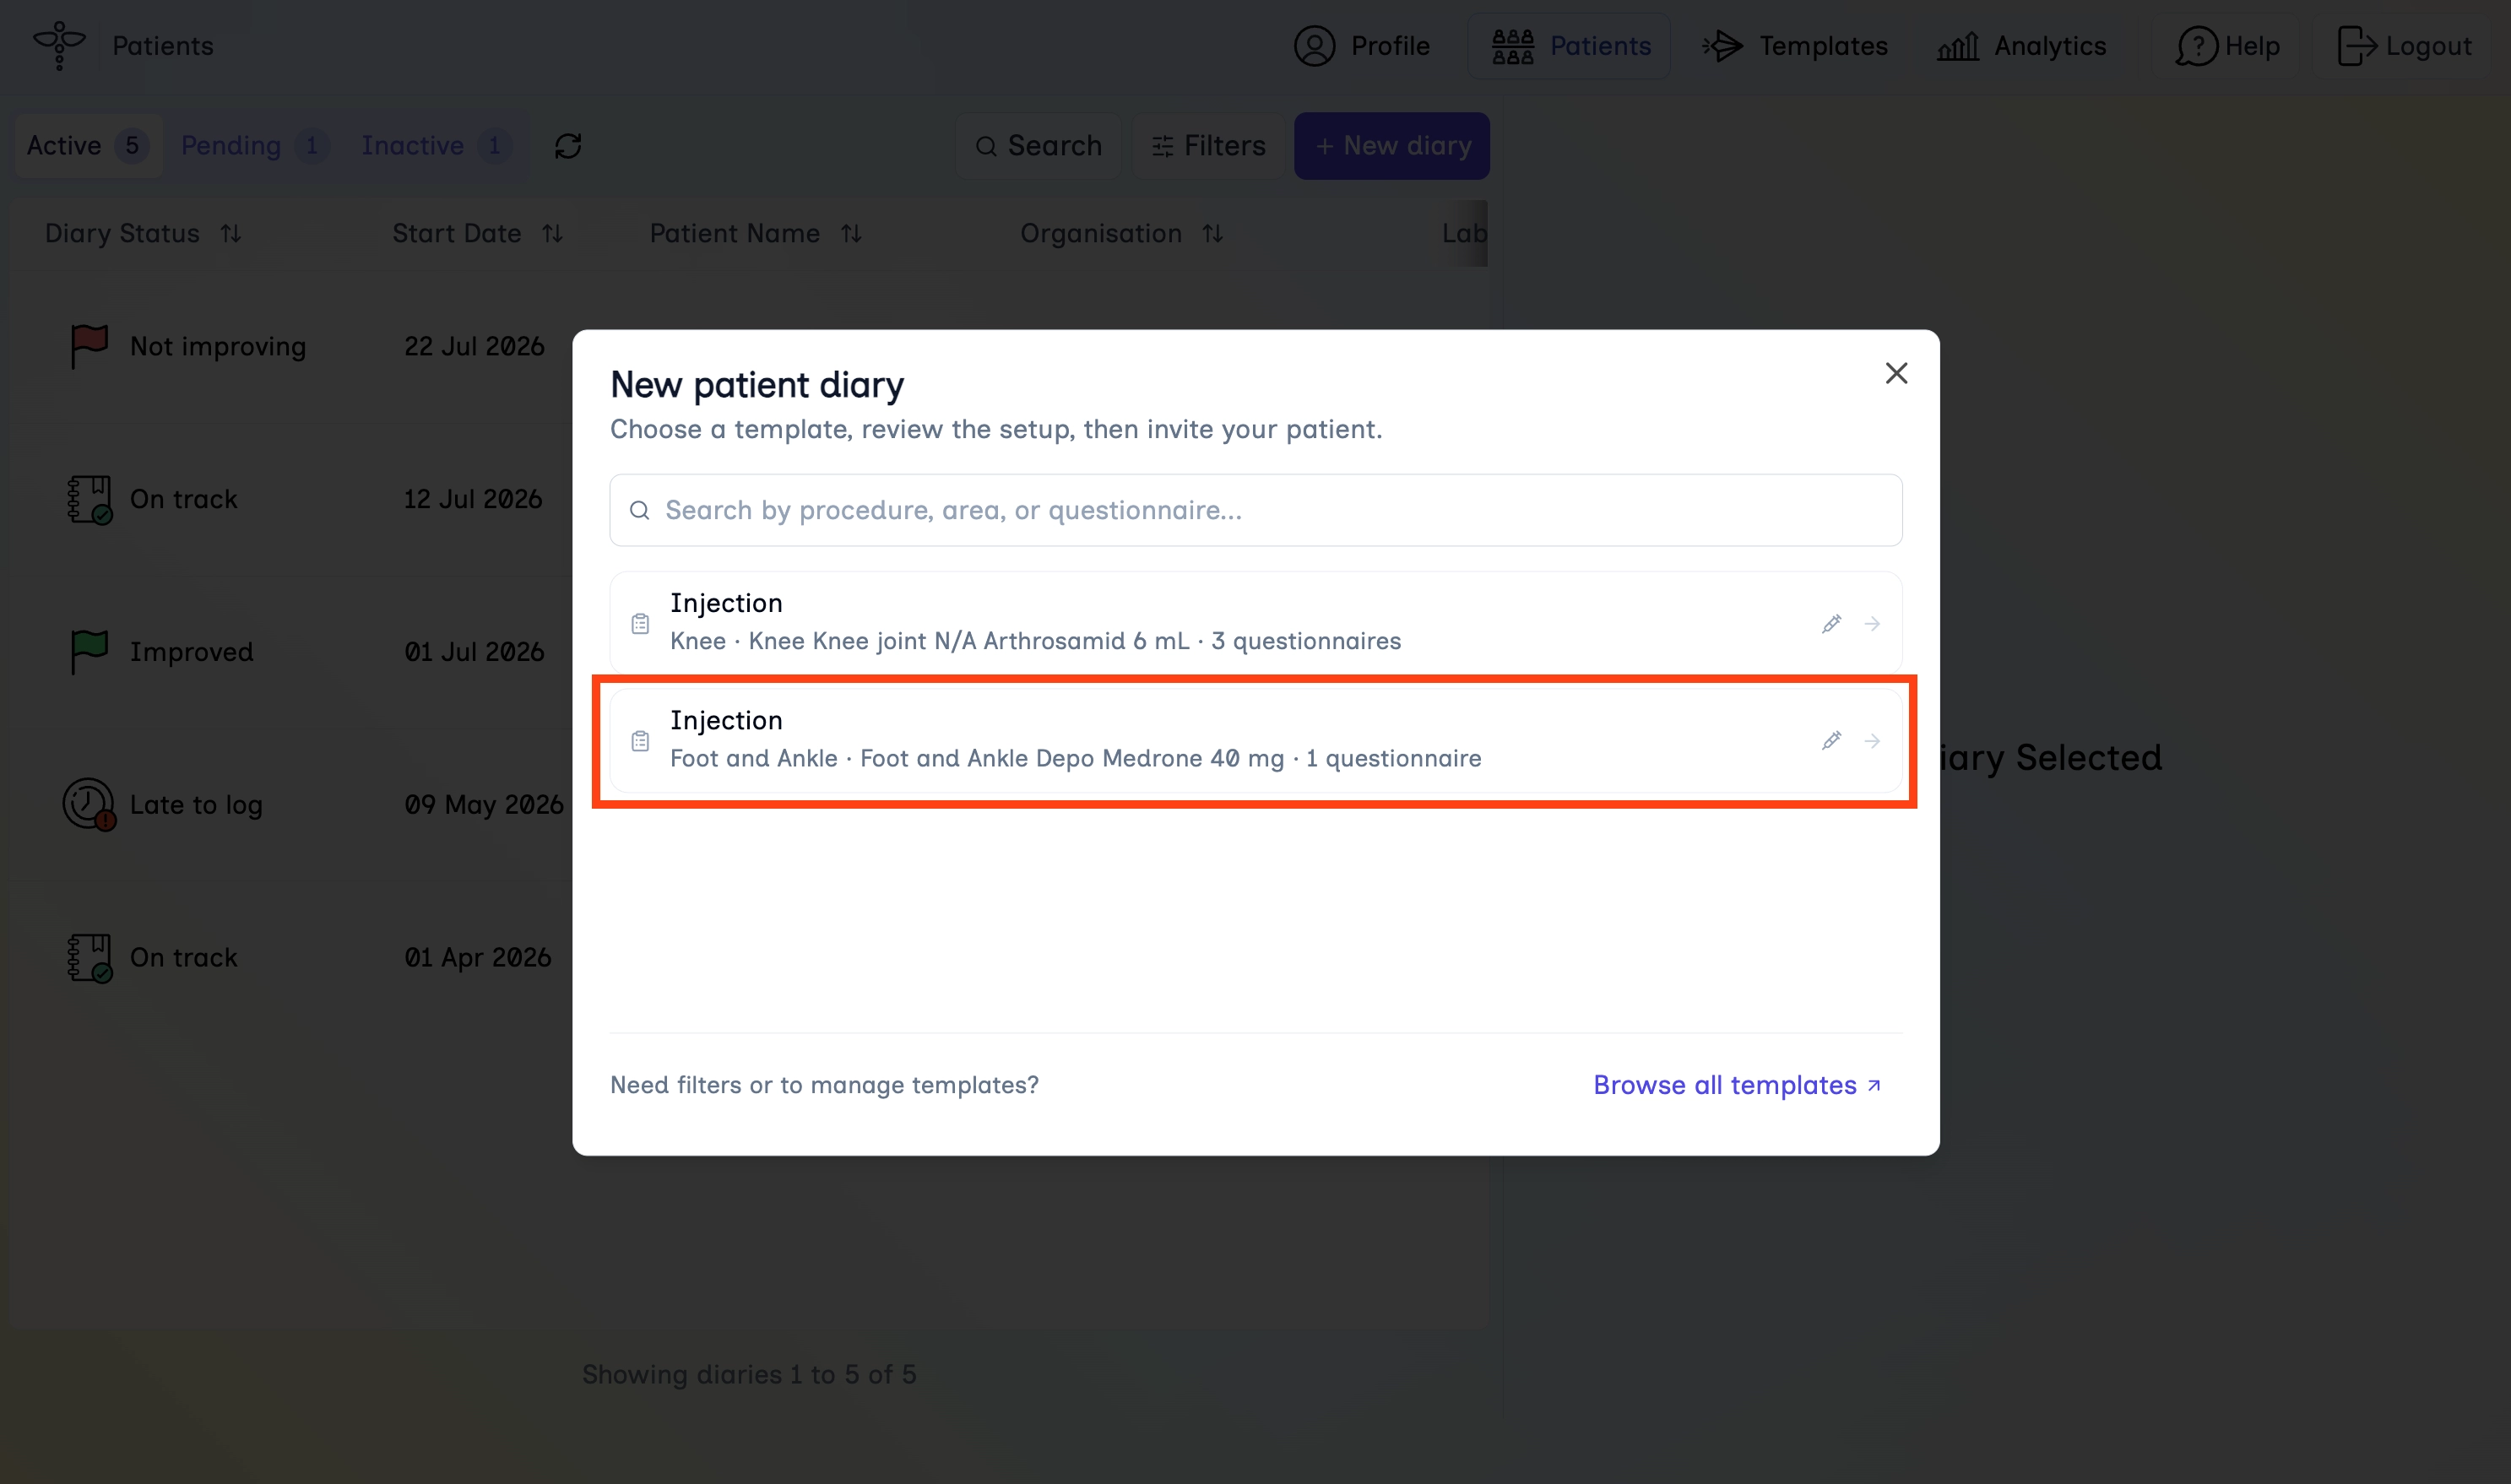
- In the New patient diary dialog, search by procedure, area, or questionnaire if needed.
- Click the template you want to use.
- To manage or filter templates in full, use Browse all templates.
Step 3A
Invite by email
Choose this on Review setup if you want the patient to receive the invite before they arrive.
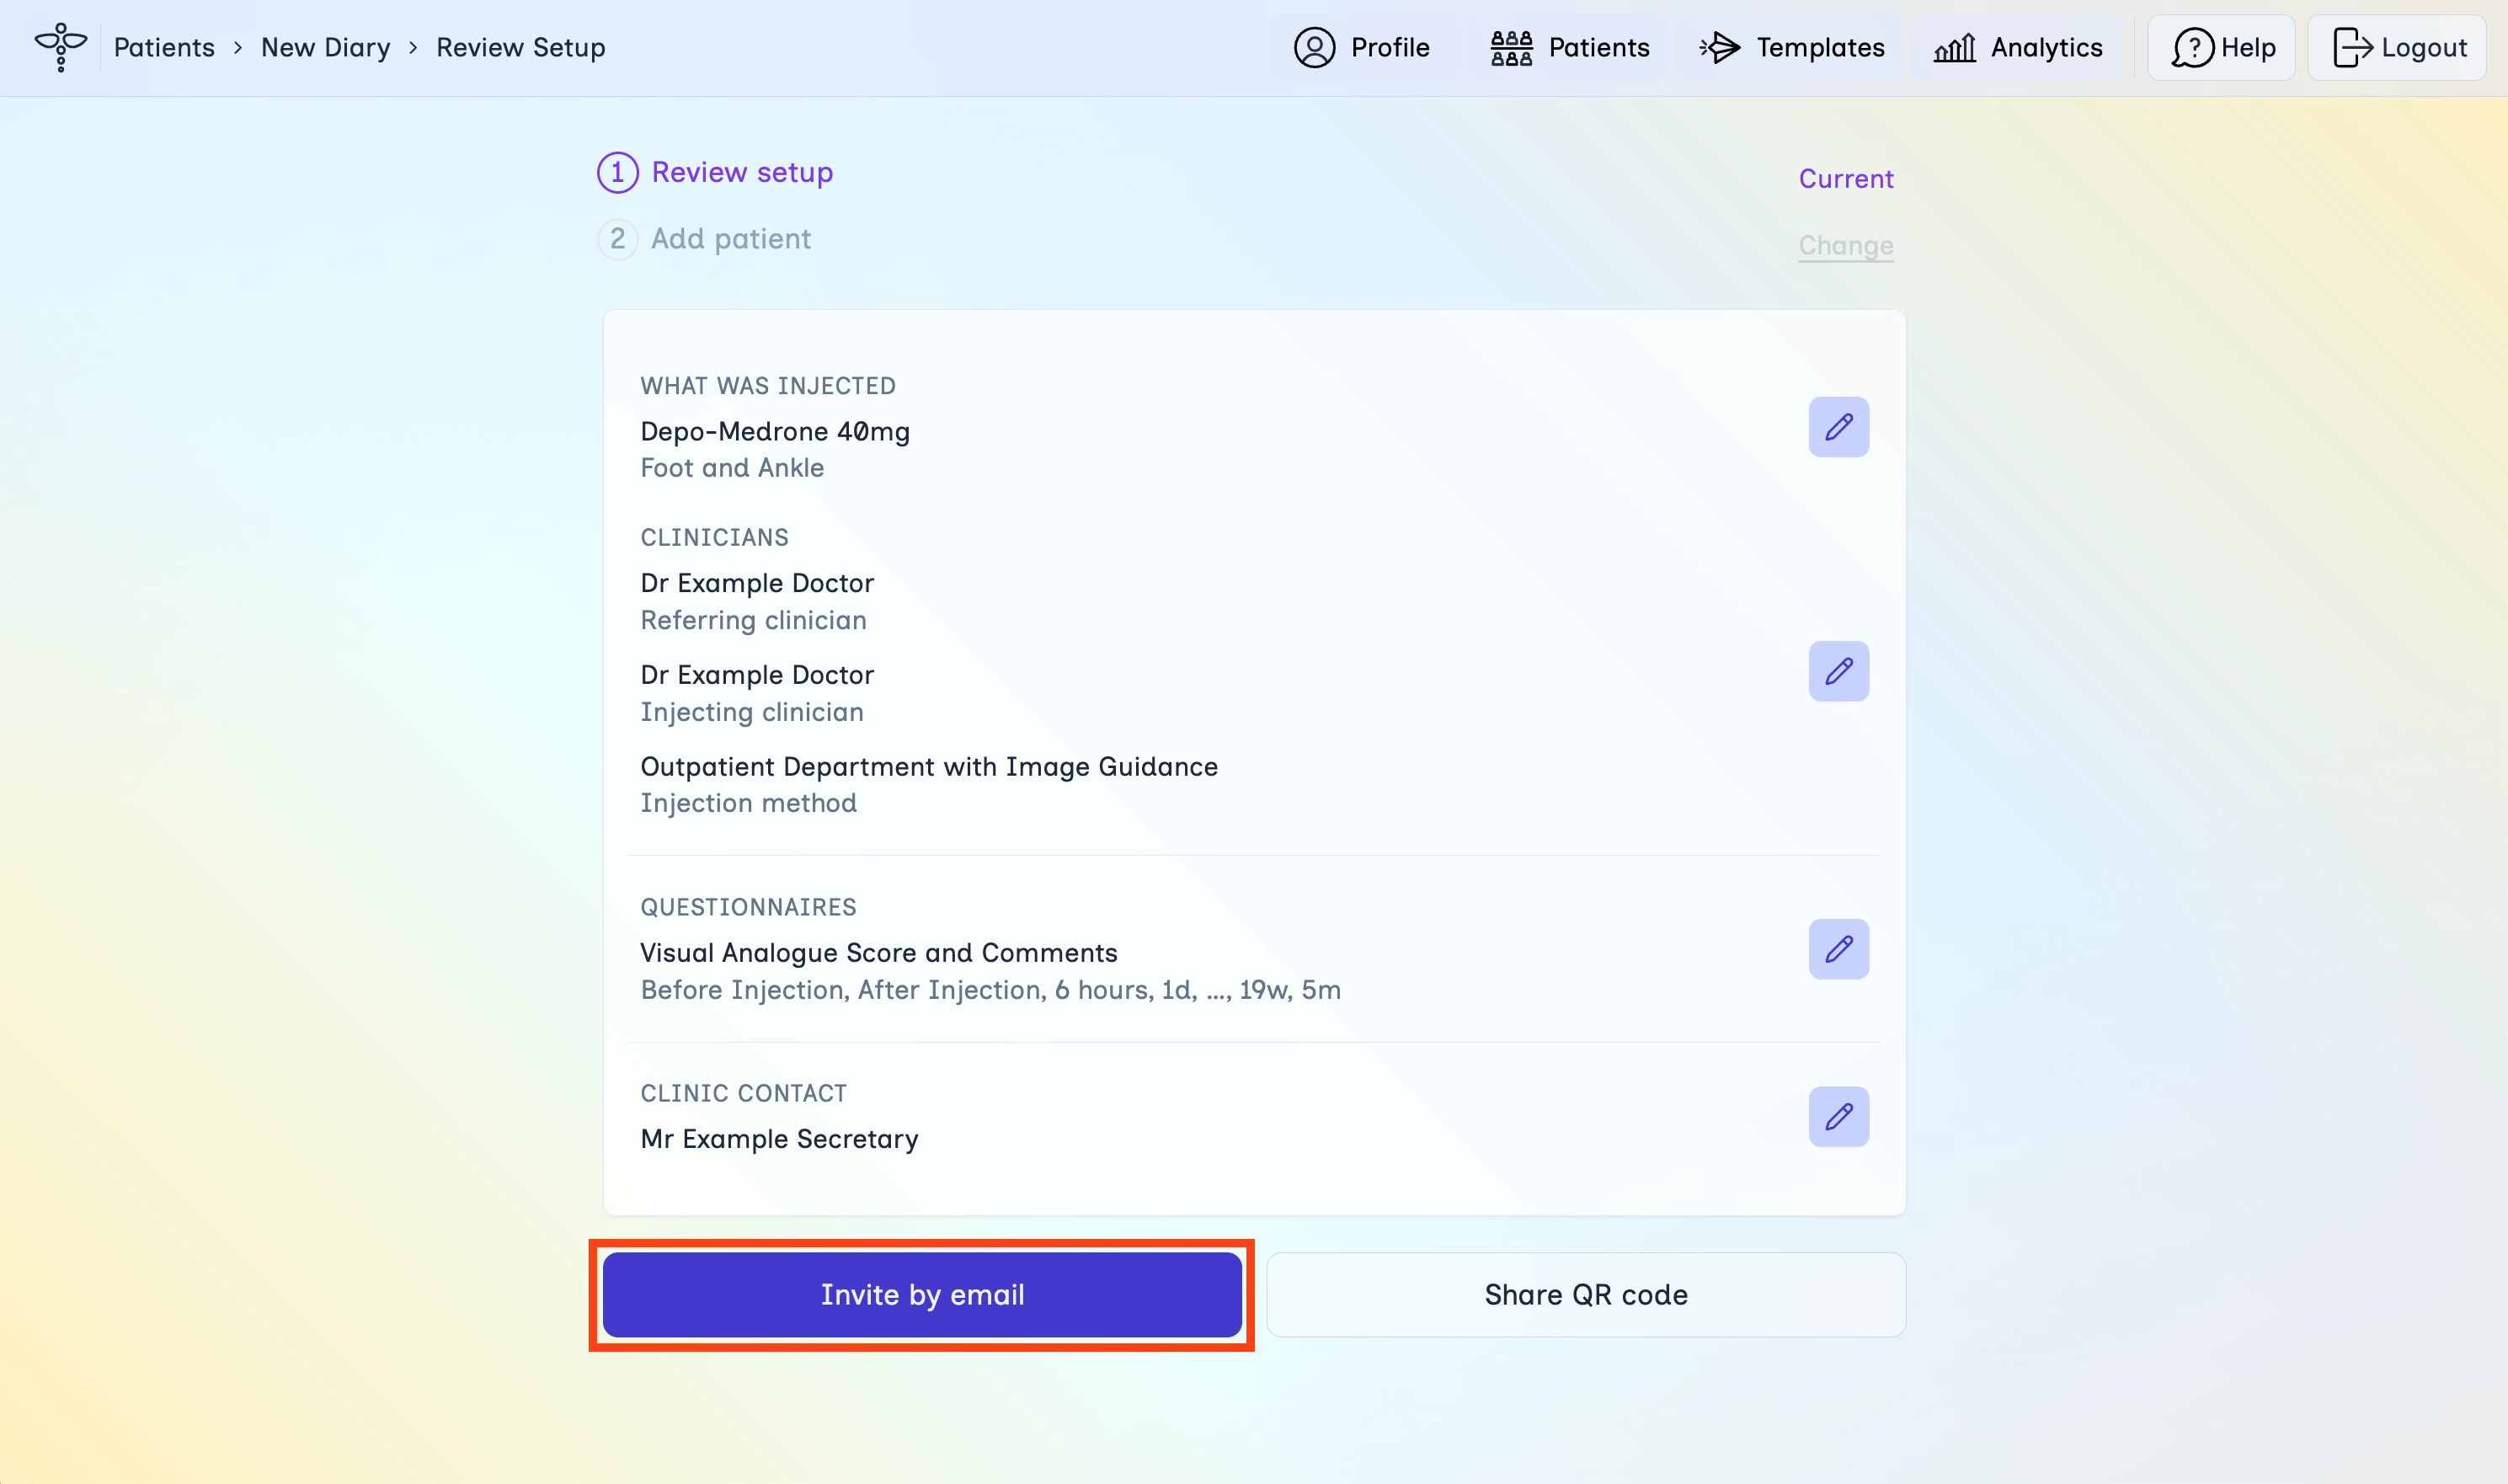
- Review each section on the Review setup screen.
- Use the edit icons if anything needs changing.
- Click Invite by email.
Step 3B
Share a link or QR code
Choose this on Review setup if the patient is with you now.
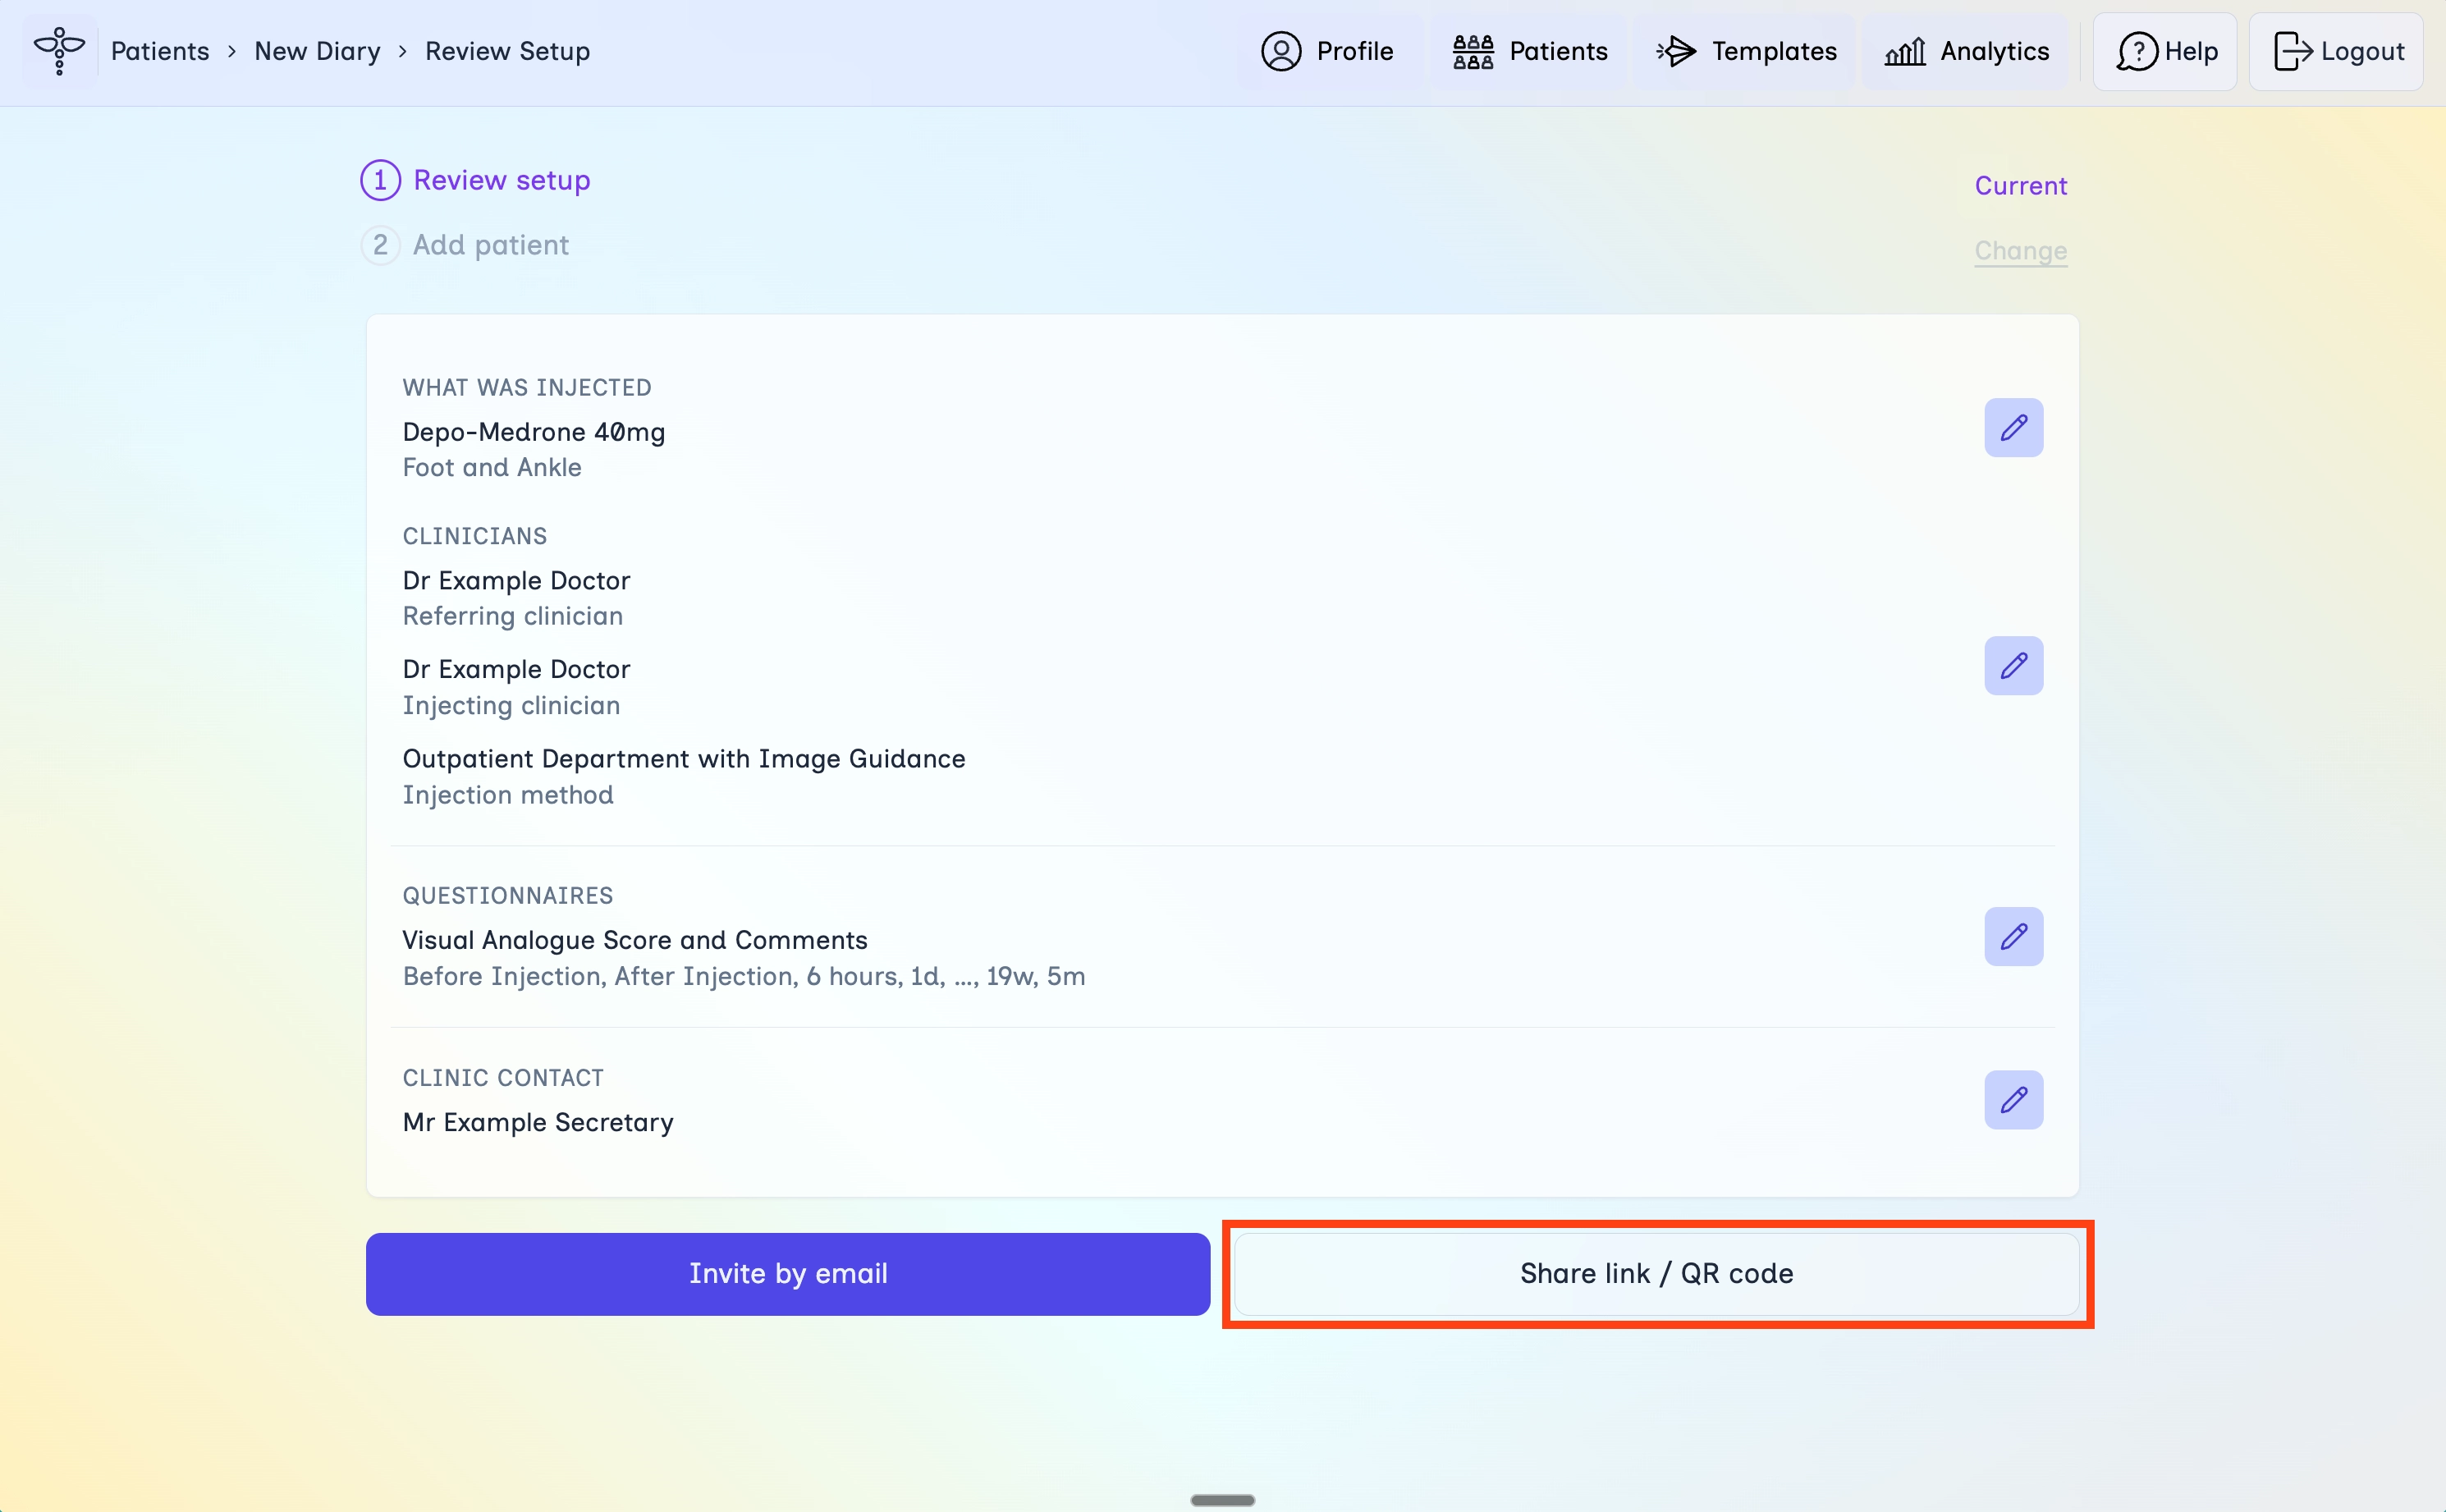
- Review each section on the Review setup screen.
- Use the edit icons if anything needs changing.
- Click Share link / QR code.
Step 4A
Send the email
Send the invite the day before, the week before, or whenever you want the patient to receive it. You or your secretary can do this.
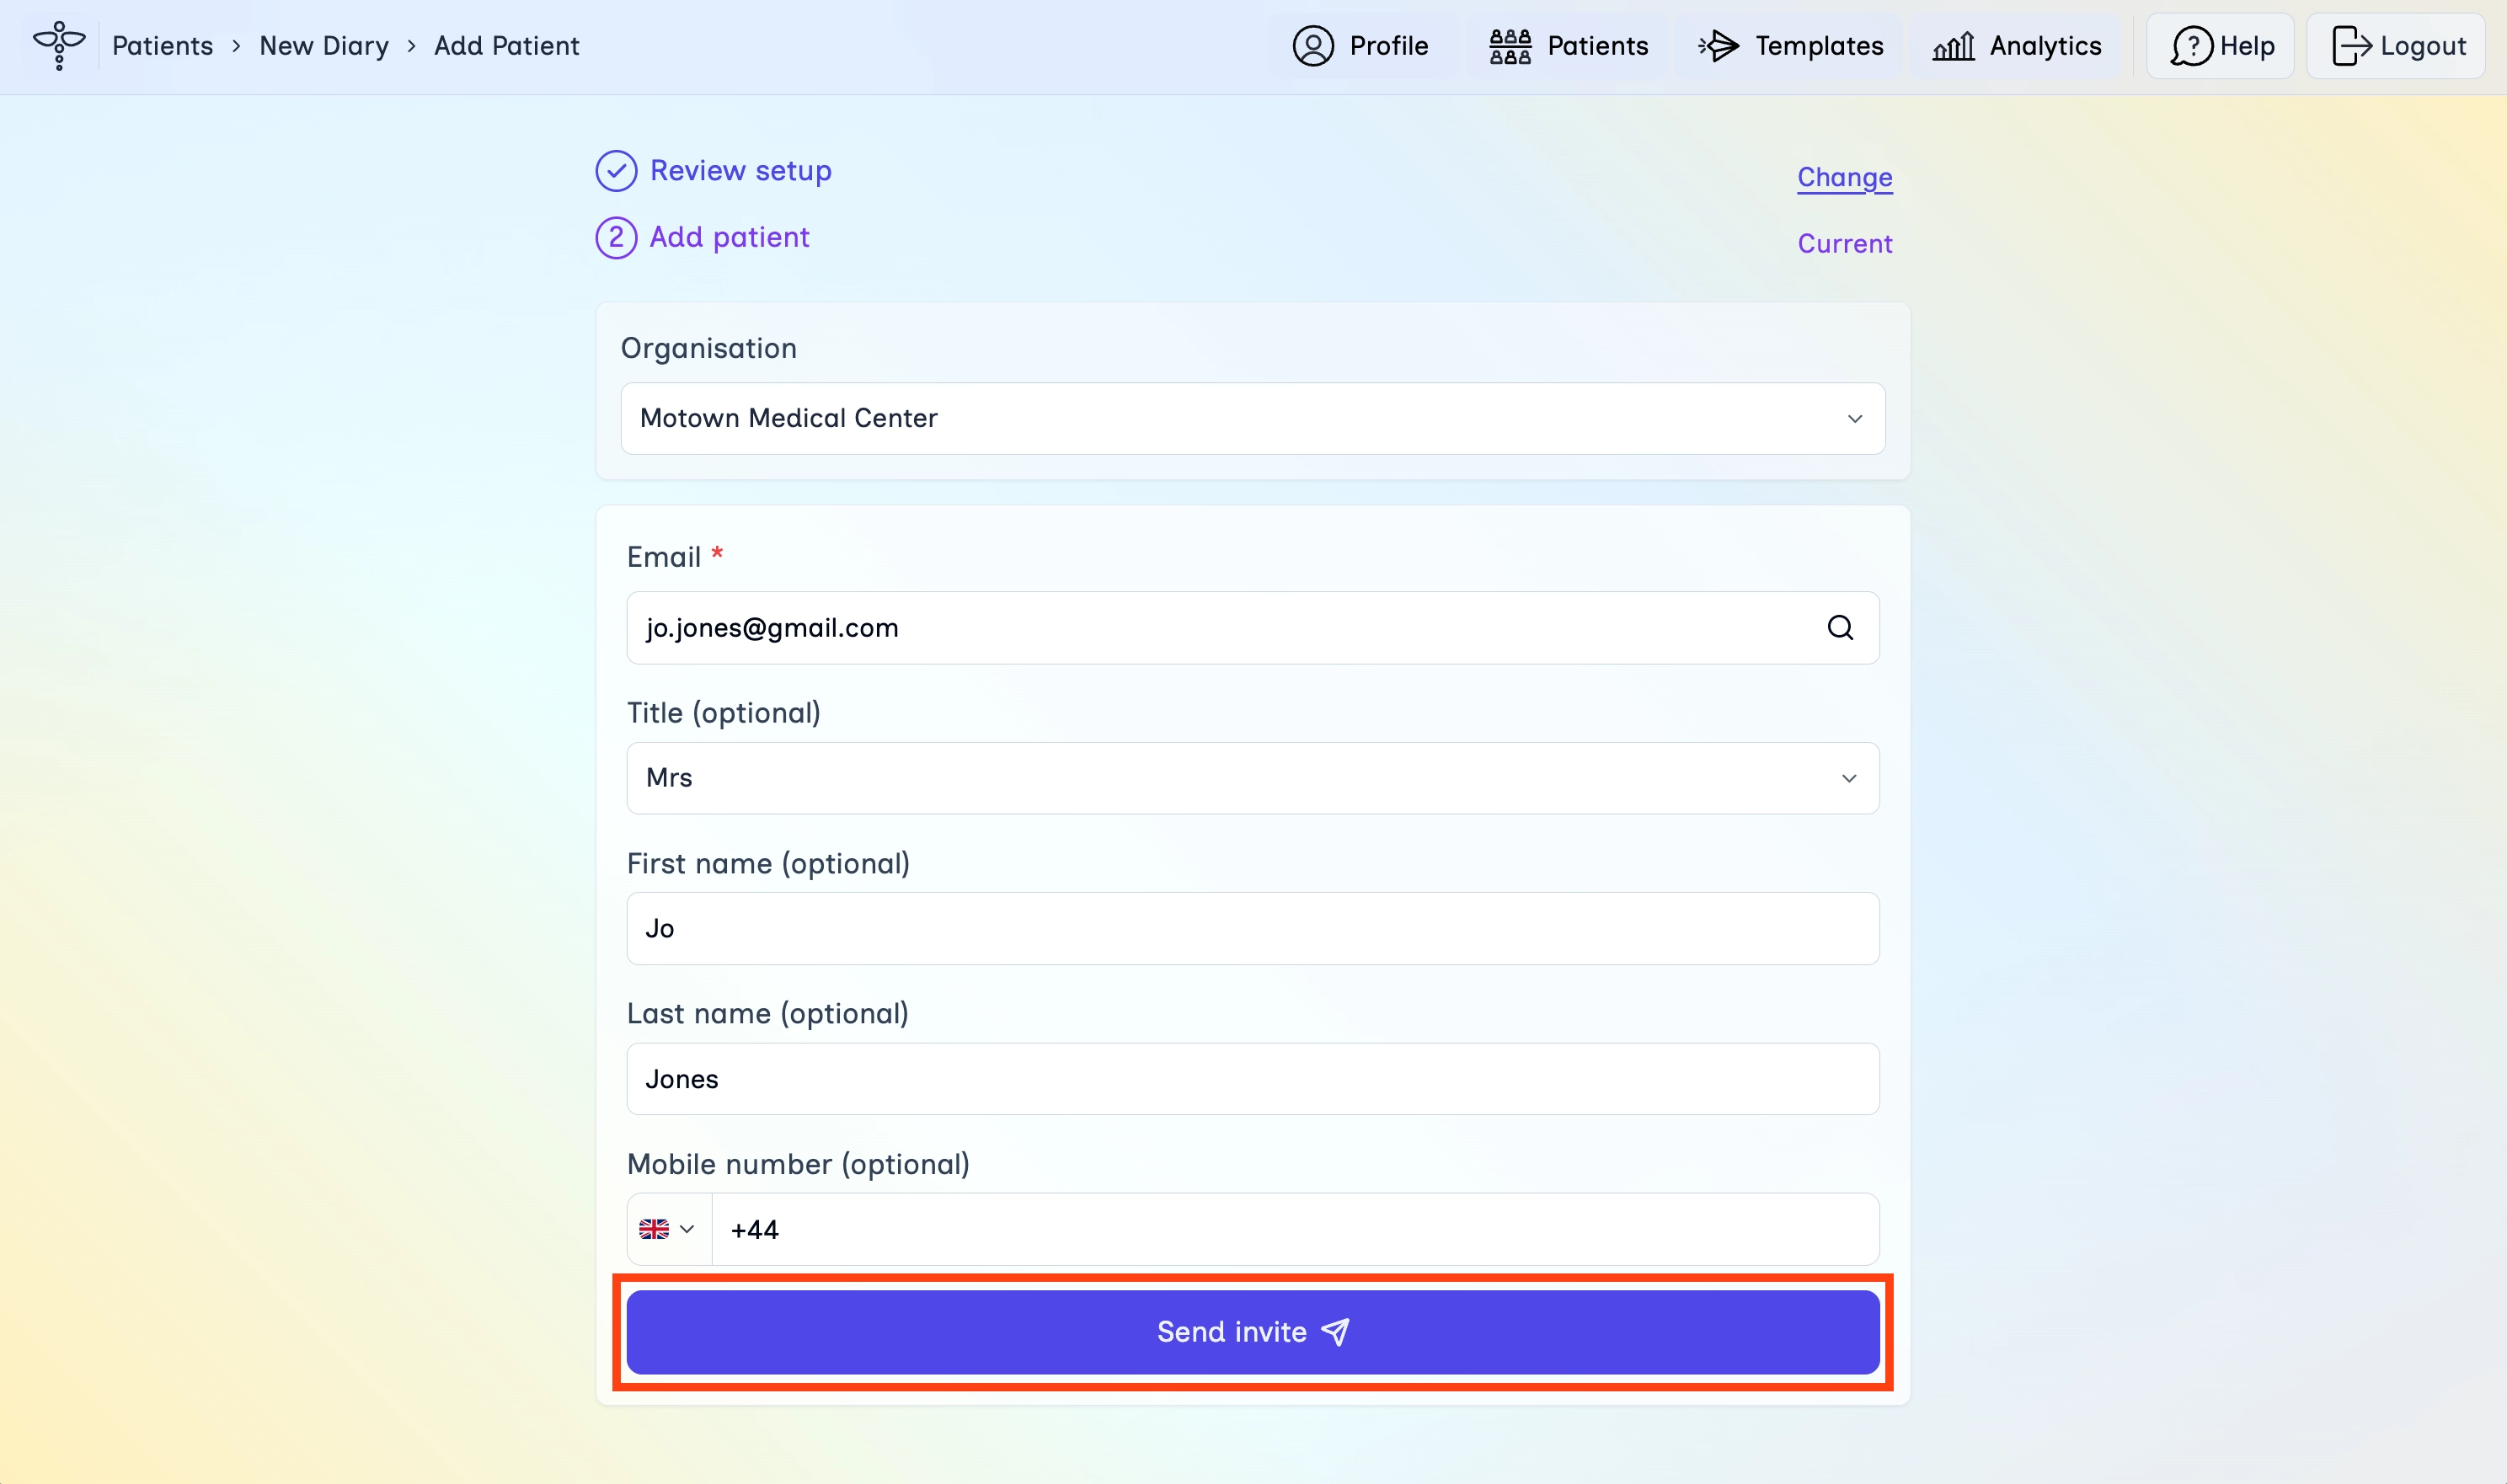
- Select the Organisation if you belong to more than one.
- Enter the patient Email (required).
- Optionally add title, first name, last name, and mobile number.
- Click Send invite.
Step 4B
Show the QR code
Use this in real time when the patient is with you, such as in the waiting room or during the appointment.
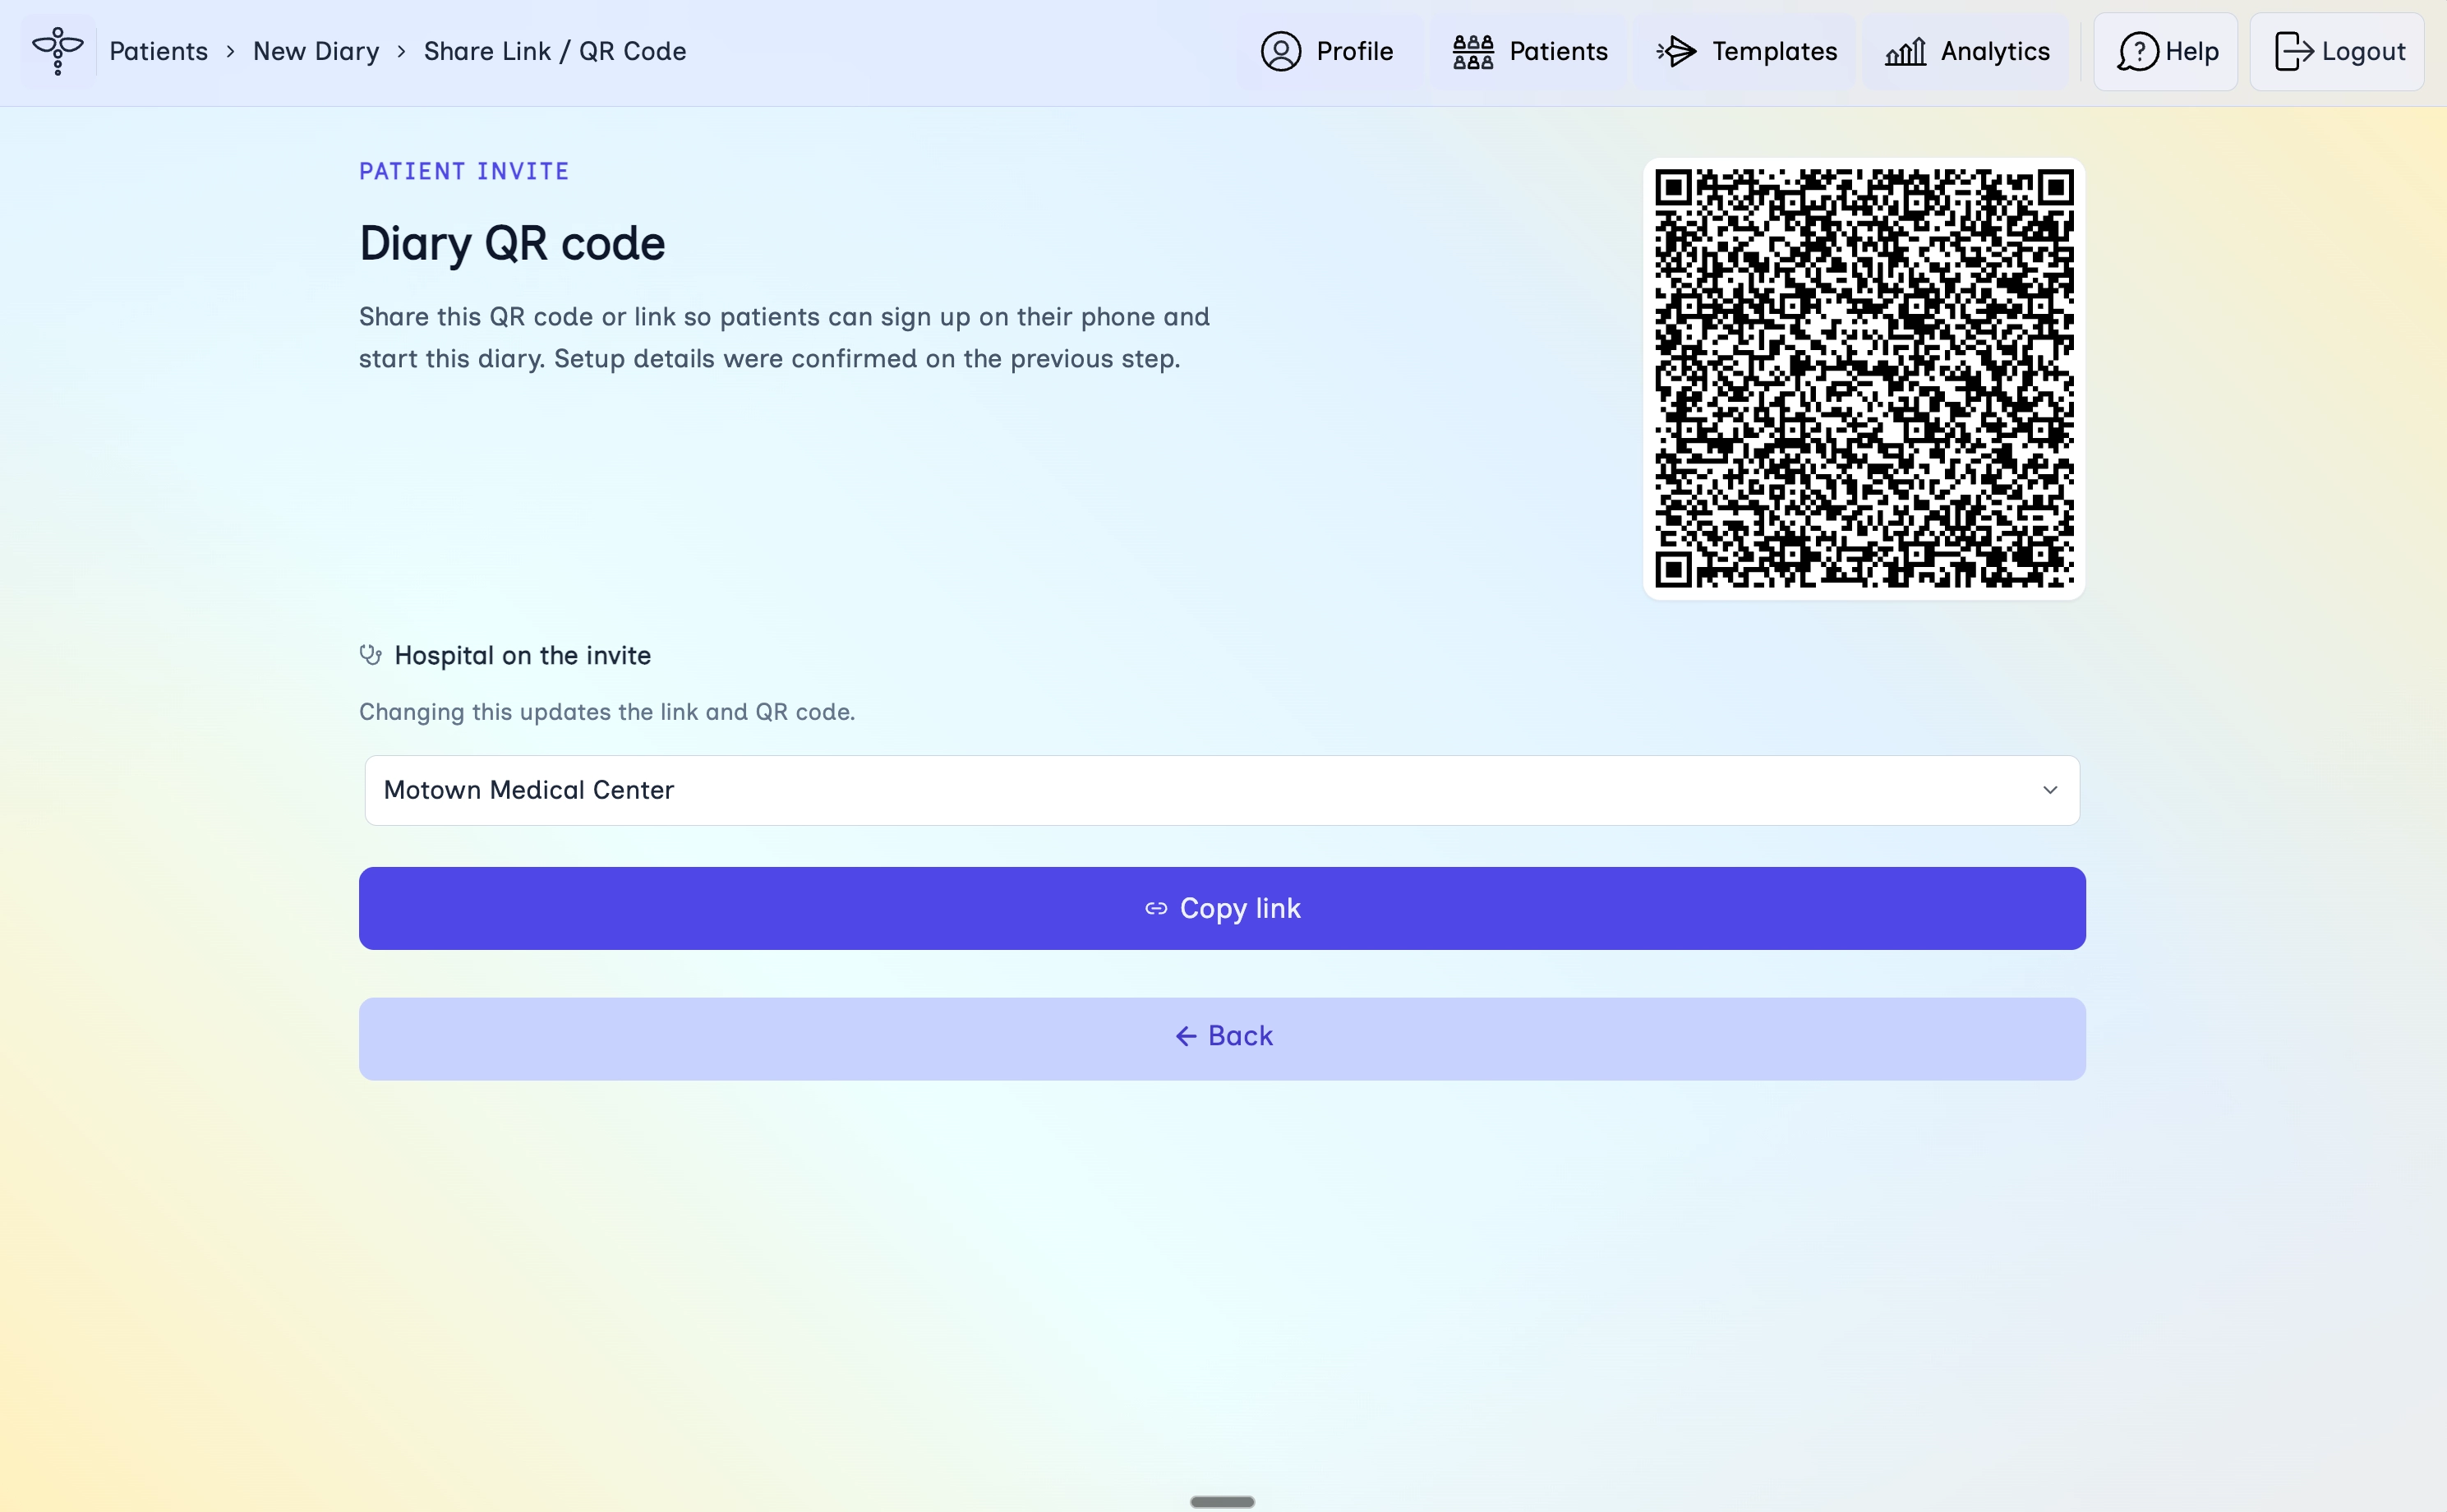
- Show the QR code on your screen so the patient can scan it on their phone and start the diary straight away.
- Or click Copy link if you want to send the link another way.
- Change the hospital on the invite if needed. This updates the link and QR code.
Step 5
Go to the diary
After an email invite, confirm it was sent, then open the new diary.
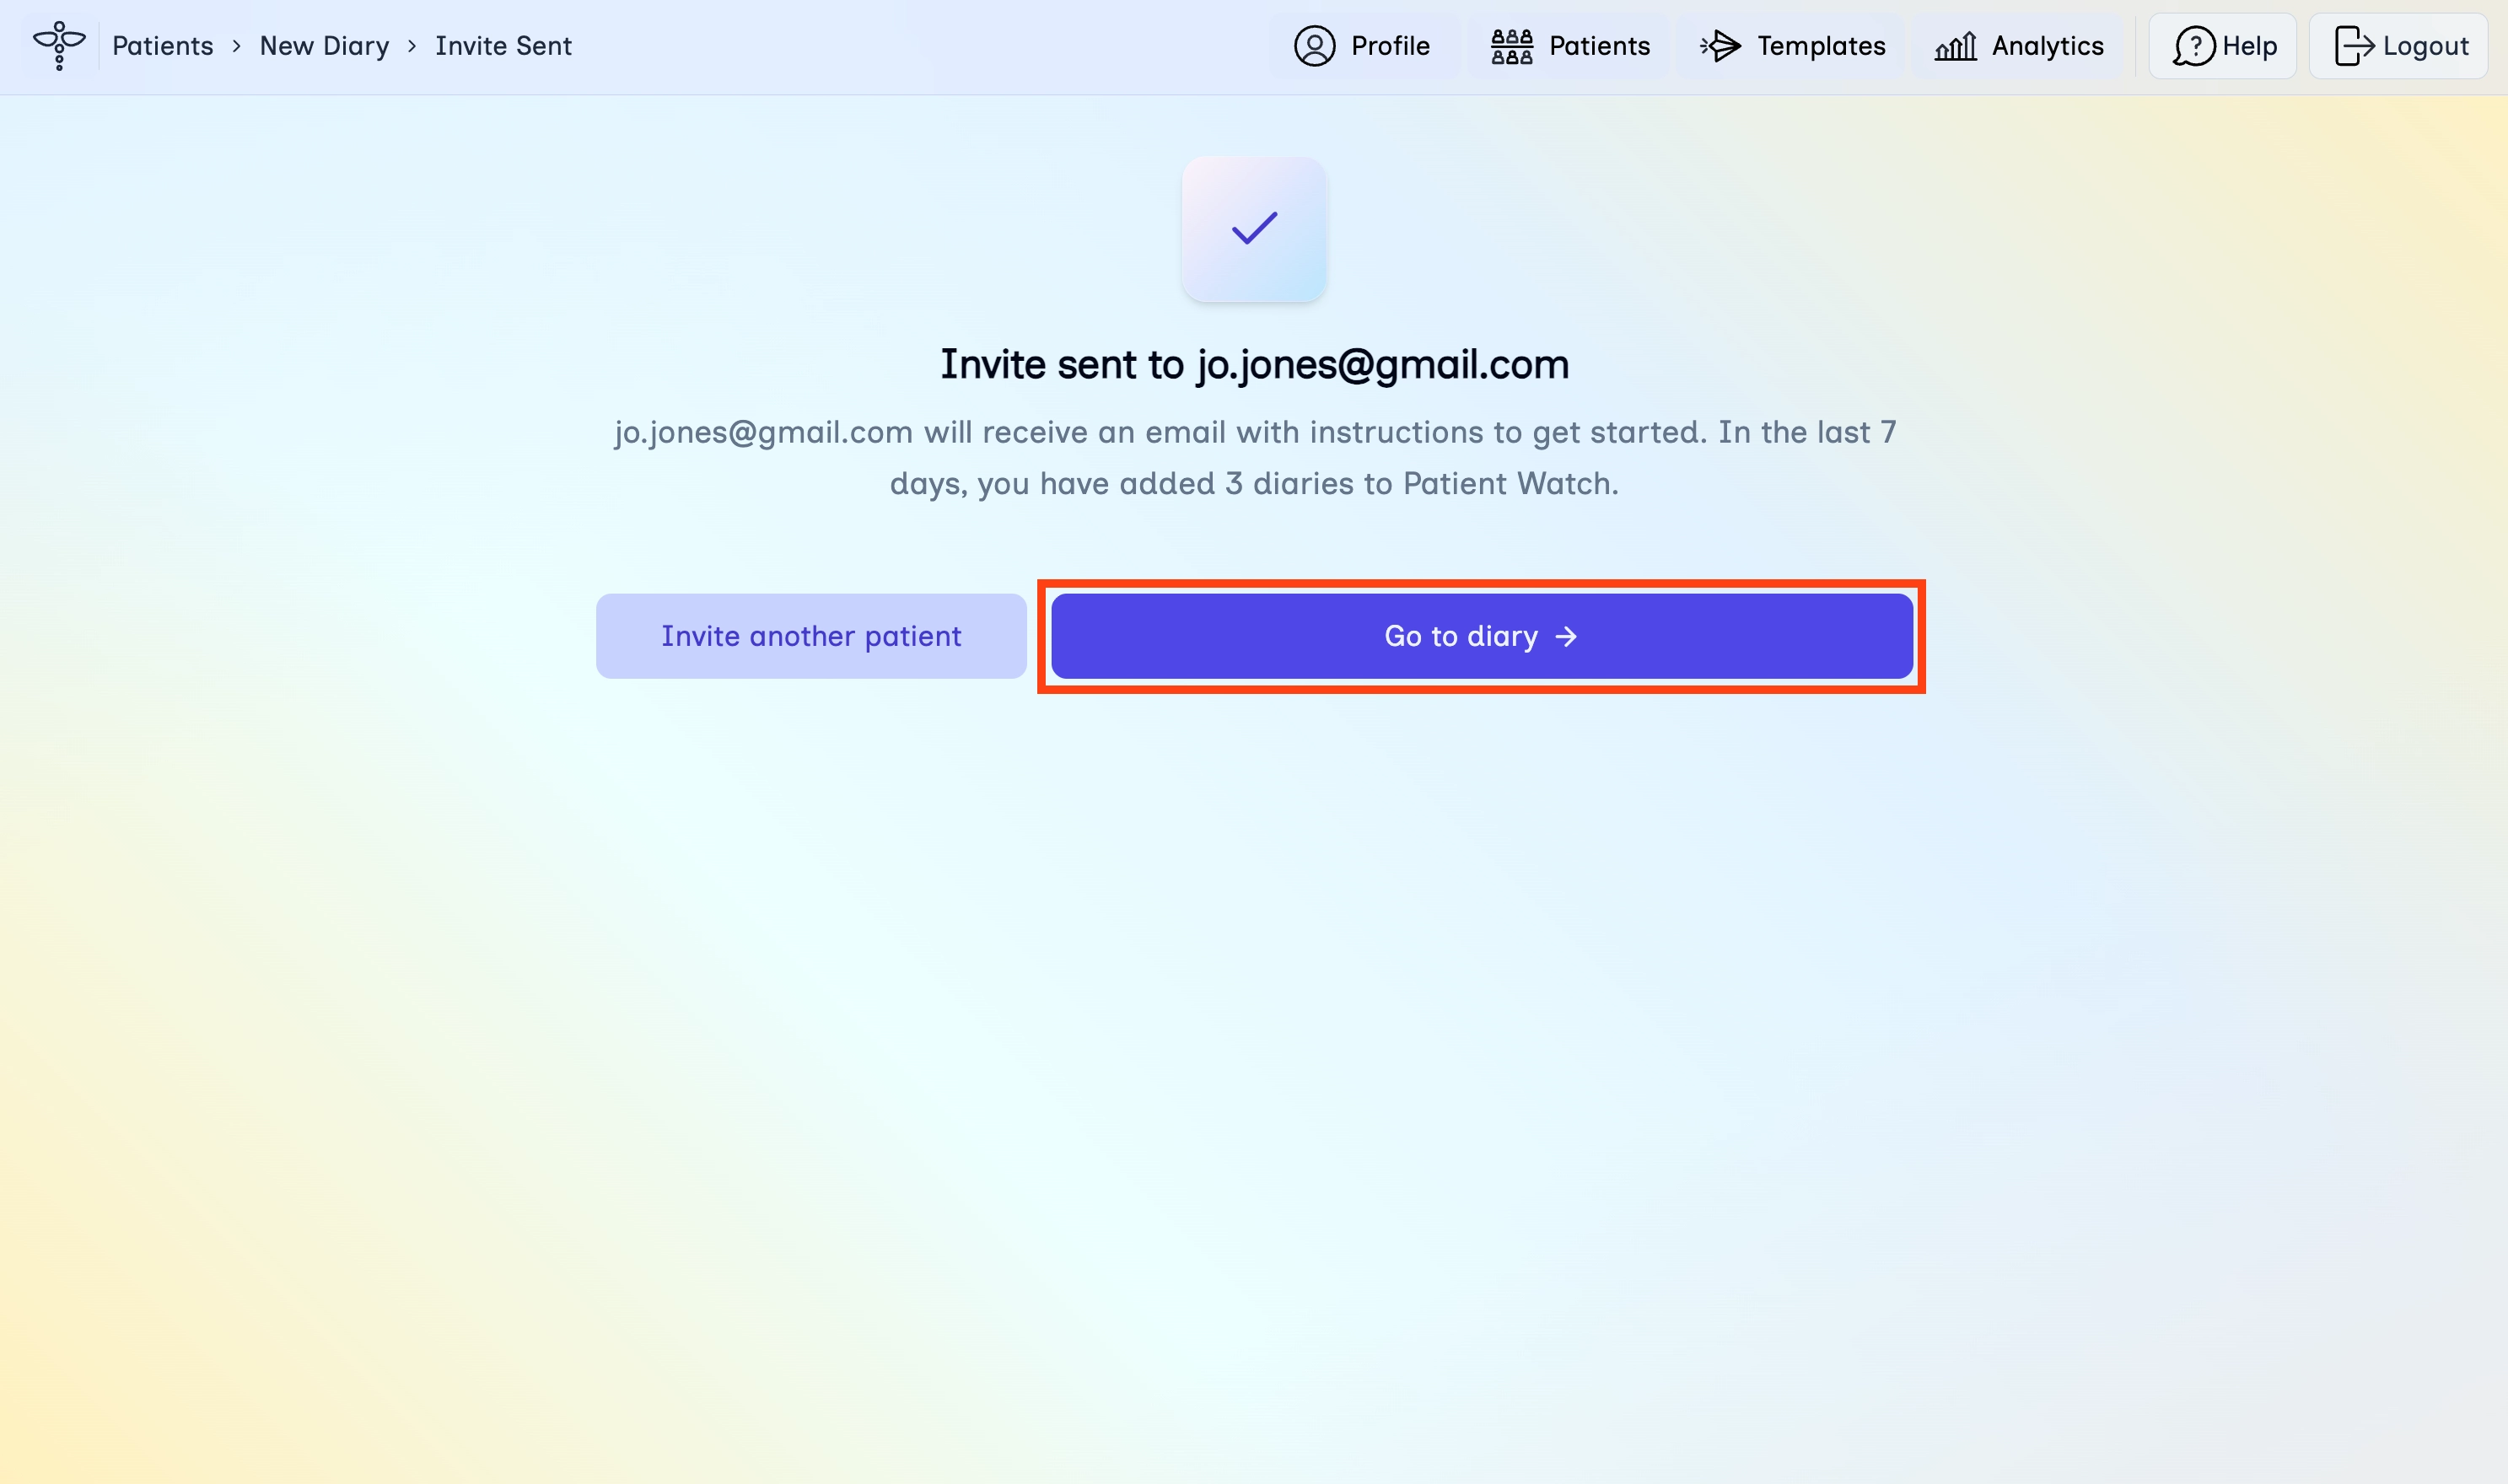
- Confirm the Invite sent message.
- Click Go to diary to open it, or Invite another patient to send another invite.
Step 6
Check pending details
After the patient accepts, complete any details still needed for the diary.
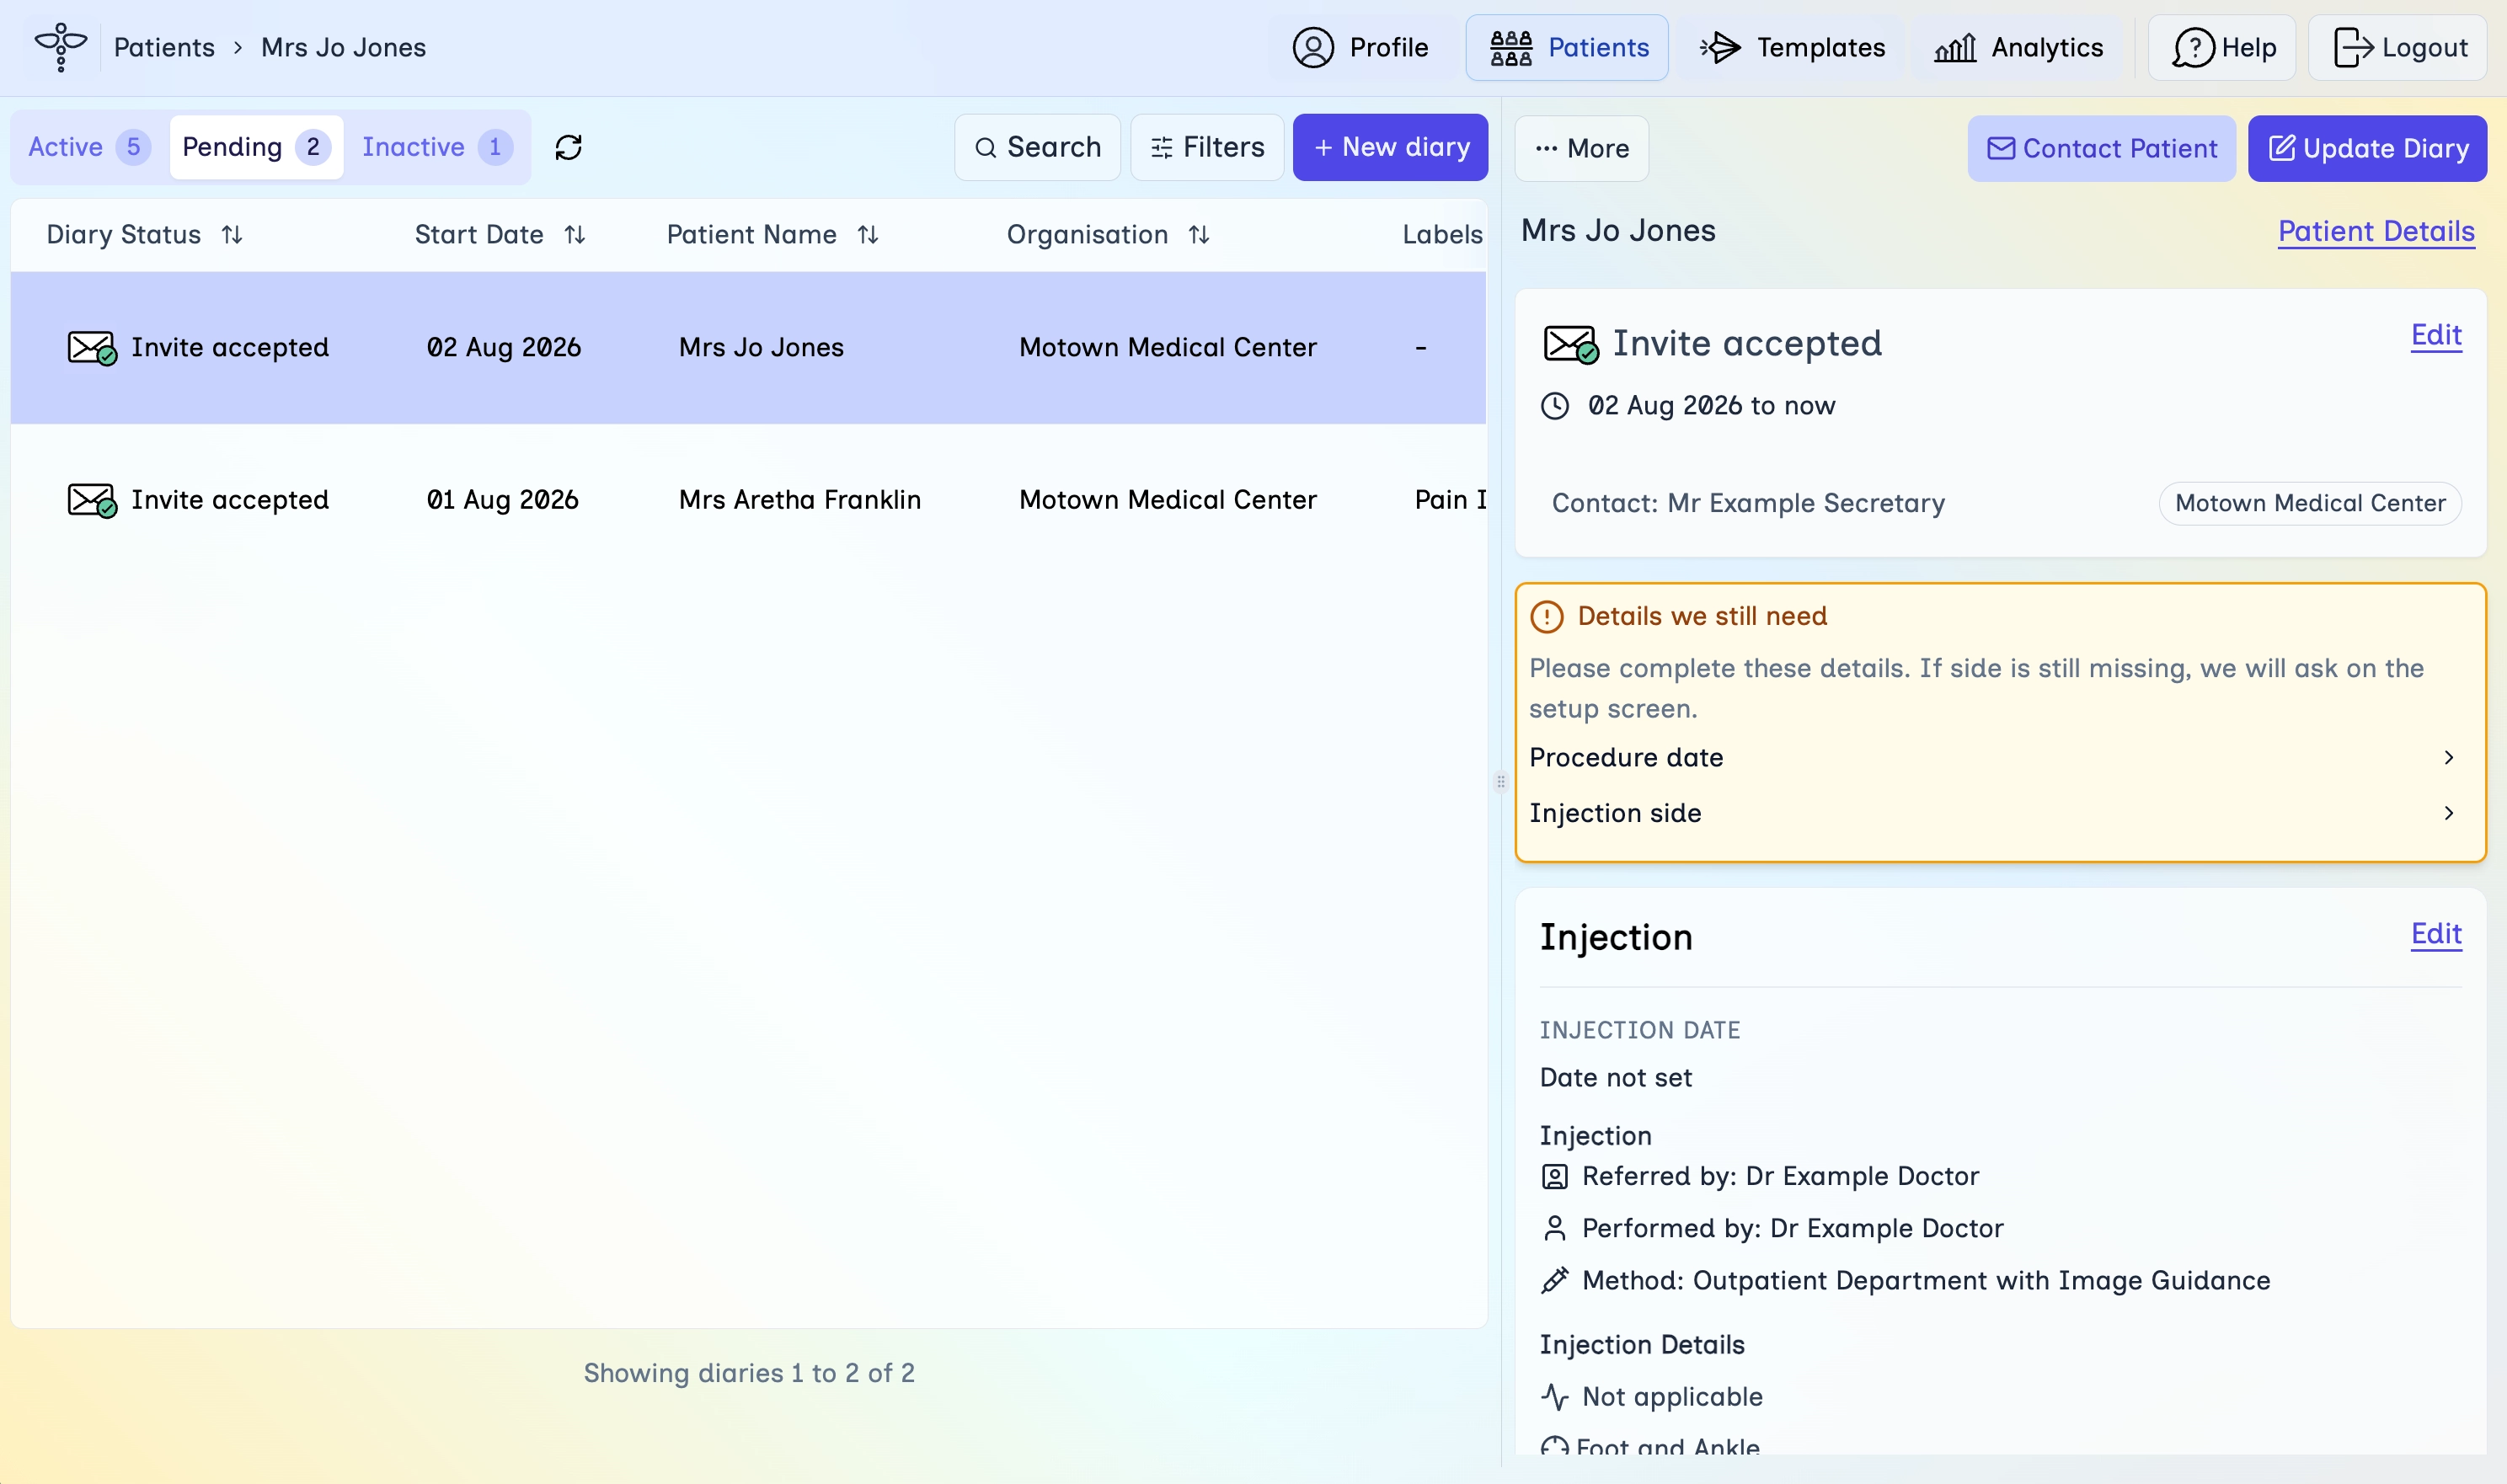
- Open the Pending tab on the Patients page if you are not already on the diary.
- Select the diary and review Details we still need.
- Complete items such as Procedure date or Injection side when you have them.
- Use Update Diary later if you need to add another procedure or end follow-up.
What's next
Continue with the next lessons in the clinician learning path.